Identifying Ghosts in Demonology can quickly become a guessing game if you're not equipped with the right tools. To avoid relying on guesswork, take a look at our comprehensive **Demonology equipment guide** below.
How to Buy and Use Equipment in Demonology
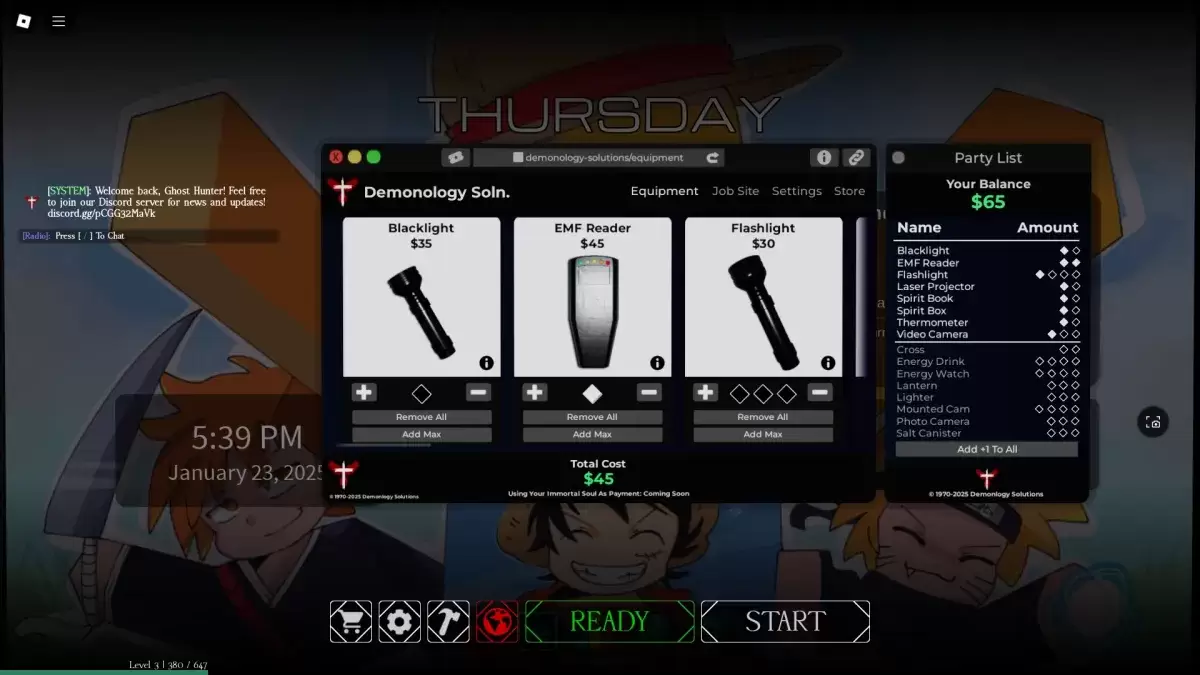
Before embarking on a Demonology run, you have the option to **purchase additional equipment**. Keep in mind that these **items are only available** for **the next run**, so make your selections wisely. Some items may also appear within the investigation areas. You're able to carry up to three items at a time. To use a piece of equipment, simply press the **RMB (M2)** button, and to drop it, use the **G** key.
Evidence Equipment in Demonology
Evidence equipment plays a crucial role in **identifying Ghosts** in Demonology. These tools are primarily used to **collect evidence** necessary for pinpointing the Ghost type you're up against. For detailed insights, refer to our guide on identifying Ghosts in Demonology. Additionally, these pieces of equipment can be used to **entice Ghosts to appear**, making it easier to capture photos of them.
| Item | Use | Party limit | Price |
|---|---|---|---|
| **Blacklight** | • Use the Blacklight to spot fingerprints, handprints, or footprints left by Ghosts. | 2 | $35 |
| **EMF Reader** | • Activate the EMF Reader to detect nearby Ghost activity. It lights up and beeps loudly when close to a Ghost. Drop it to use as a perimeter scanner. | 2 | $45 |
| **Laser Projector** | • Turn on the Laser Projector, place it down, and watch as it highlights moving Ghosts with its beams. | 2 | $65 |
| **Spirit Book** | • Leave the Spirit Book on the ground. If a Ghost is nearby and leaves Spirit Book evidence, it will write in it. | 2 | $40 |
| **Spirit Box** | • Engage with the Spirit Box to communicate with nearby Ghosts using various dialogue options, though they may not always respond. | 2 | $50 |
| **Thermometer** | • Check the temperature with the Thermometer. Normal room temperatures are 15-19 degrees; deviations can indicate a Ghost's presence. | 2 | $30 |
| **Video Camera** | • Use the Video Camera to view Ghost Orbs. Place it on the ground and monitor it via the PC at the spawn area. | 3 | $50 |
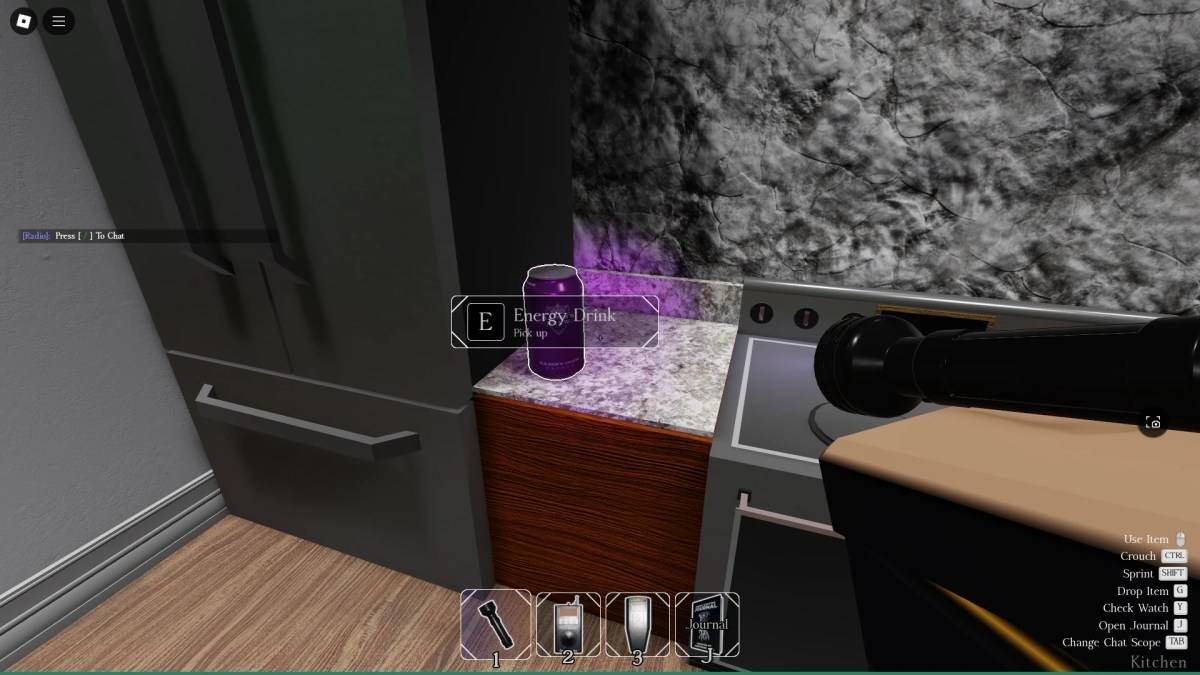
Optional Equipment in Demonology
Optional equipment in Demonology enhances your chances of survival and helps in achieving secondary mission objectives. As with all equipment, there's a limit to how many you can take into a run.
| Item | Use | Party limit | Price |
|---|---|---|---|
| Flashlight | • Illuminate your path with the Flashlight's focused beam. | 4 | $30 |
| Cross | • Use the Cross to repel a Ghost that's hunting. | 2 | $30 |
| Energy Drink | • Consume an Energy Drink to replenish some of your Energy. | 4 | $30 |
| Energy Watch | • Check your remaining Energy levels with the Energy Watch. | 4 | $50 |
| Lantern | • Hold the Lantern to prevent your Energy from passively draining. | 3 | $15 |
| Lighter | • The Lighter can ignite the Lantern and candles, and also serve as a light source. | 3 | $10 |
| Mounted Cam | • Similar to the Video Camera, but can be equipped simultaneously with other items. Monitor it via the PC near the spawn. | 4 | $50 |
| Photo Camera | • Capture images of Ghosts and other elements with the Photo Camera, useful for completing optional objectives. | 3 | $40 |
| Salt Canister | • Create lines of Salt to ward off certain Ghosts and secure handprint evidence. | 3 | $15 |
That covers everything you need to know about the equipment in Demonology. For more tips and tricks, check out our other Roblox guides in the Roblox section of Escapist.


![Chubby Story [v1.4.2] (Localizations)](https://images.737c.com/uploads/85/1719638042667f981a5e9f8.jpg)